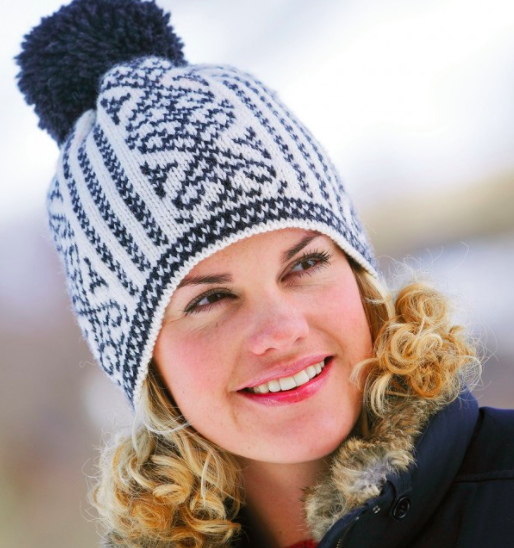
Easter Knit A Long: HAT
1 Here we go!
Let`s get started!
You`ll find the pattern in the link below, + a tutorial video about how to read and understand it!
Have FUN!

Sandnes HAT for KAL March 2018.pdf
How to read the pattern:
Information on yarn and needles
With regards to yarn quantities, you`ll need:
Original Yarn: SANDNES PEER GYNT
MAIN Color: 100 gram
CONTRAST: Color: 50 gram
Original Colors:
Charcoal (Koks) 1088: (Contrast color on photo)
White (Hvit) 1002: (Main color on photo)
Other color suggestions: Main color Yellow 2015 + Contrast color: White 1002
SUGGESTION for VARIATION:
The most popular version for men is in "opposite" color combination, black main color, with white pattern, without pompom.
WHY NOT KNIT TWO HATS, OR MORE?
Perfect gifts!
You will also need:
Small (short) circular needles:
US 1½ - 2.5 mm
And
US 4 - 3.5 mm
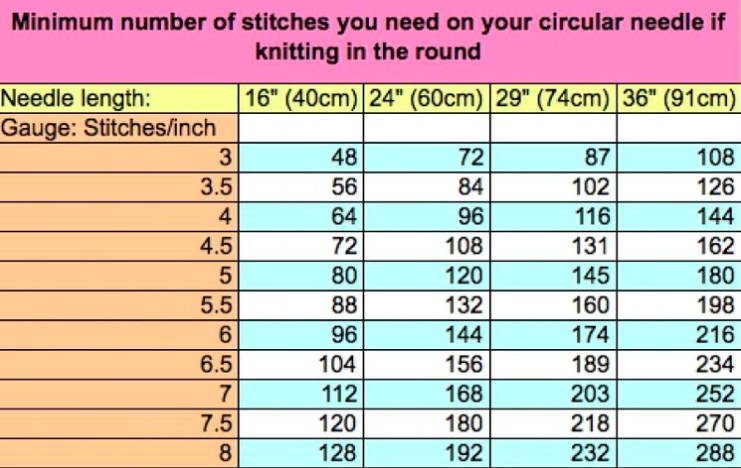
This may help:
 (Source: Frogginette.com)
Many prefer to knit on double pointed needles (DPN`s) at the "end" (on the crown of the hat).
Order your yarn ASAP, and get the discount - and be ready for our Easter KAL - it will be SO MUCH FUN!
If you are wondering about any substitute yarn, here are the specifics for the chosen yarn for this pattern (Peer Gynt):
Per Gynt Yarn:
Weight:
DK (11 wpi)
Meterage:
98 yards(90 meters)
Unit weight
50 grams (1.76 ounces)
Gauge
22.0 sts = 4 inches
100% Wool
Texture
plied
- however, the original yarn (as used in the pattern) will usually give you the best result, just saying..
2 Cast on
3 Joining the round
Make sure all your stitches as the same way!
3 Gauge
How to check your gauge/tension
4 Purl.....or cheat??
In this particular pattern, you can choose between proper purling, and....well, "cheating" a bit.
5 Introducing color no two
This is how you start knitting with the second color.
6 Knitting with two colors
Avoid twisting by doing this!
7 Knitting Pattern B - the first row
8 Knitting Round two - pattern B
9 Personal choices as you knit
Adjusting to your liking!
10 - Decreasing - start (1)
11 - Decreasing - part 2
12 - Decreasing - part 3
14 - Closing the hat
15 - Sewing up the hem
16 - Blocking
Never put your iron directly on the knitting!
17 - Making a pompom
I have borrowed this video, because I do it EXACTLY like her:
A really nice finish to your hat!
18 - Problem solving: How to pick up a dropped stitch
CONGRATULATIONS!!
You DID it!!
You have done a really great job - PLEASE share a photo of your hat in the Facebook group, so that we can give you the praise you deserve!!
WELL DONE!!!
2 comments so far
Thank you for the wonderful instructional videos! Your directions are quite clear. I think I tend to knit tighter as I learn this “new” method. Hoping I will relax a bit as I master the technique!


Very enjoyable to knit. And the result is a very cosy hat. Thank you!